

How To Make A Filter For A Laser Cutter
Edifice a Laser cutting and engraving smoke frazzle filtration system.
Filtering your laser cutting and engraving fumes are of slap-up importance, not only to yourself, just to our neighbors and others working in and near your workspace. We have designed and tested a relatively easy to build DIY laser cutting and engraving exhaust filtration system using activated carbon filters along with other air filters. Nosotros take made it easy to build and assemble for anyone with minimal knowledge of building, however you lot volition need access to a CNC router such as a ShopBot (luckily your Local Fab Lab, Makerspace or Techshop will nearly probable accept one available for a reasonable rate). The full cost ranges between $150 to $350 depending on the quality of products you choose and availability of materials in your area. It is well worth the investment though.
Materials Needed:
- Five sheets of iii/4″ plywood – $20-$60 each ($100-$300 total, higher quality wood is recommended)
- One air filter of sixteen″ 10 20″ x ane″ – $15-30 (pack of 12)
- Iv activated carbon filters (or DIY version, encounter below) of 16″ 10 xx″ x 1″ – $l each or
- Ane honeywell filter of 16″ x 20″ 10 5″ – $30
- Two 4″ exhaust duct connectors – $fifteen each
- Box of 1/8″ bolts (100 pcs) – $15
- Glue – $five-thirty
- Box of forest screws (100 pcs) – $10
- Four wheels with movement lock (optional or add subsequently) – $5 each
- Chaulk Gun
- Silicone tube
DIY Activated Carbon Filters:
- Four air filter of 16″ x 20″ 10 1″ – $fifteen-30 (pack of 12)
- Activated carbon min 16 pounds – $49.95 for 20 lbs
Hardware Needed
- Screwdriver
- Clamps for glue (helps simply not entirely necessary).
- Shopbot CNC or other CNC router for routing the plywood sheets. (Local Fab Lab, Makerspace or Techshop tin be used to route the pieces at a reasonable cost).
- Sander or sand paper
The design – piece of cake to replace filtration 'drawers'
The blueprint in based on having quick and like shooting fish in a barrel admission to substitution air filters. Air filters volition need to be changes nigh four to half-dozen times per year, depending on frequency of use. Then allowing to access the filters with ease and keeping it air tight is of swell importance.

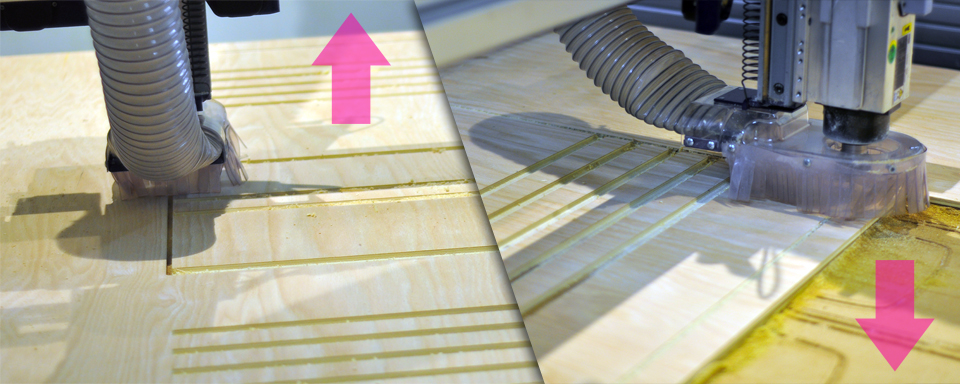
Routing Plywood On ShopBot (or other CNC Router)
Nosotros used 5 sheets of oak plywood from a local lumber yard (discounted at $30 each, unremarkably $lx). Just phone call your local lumber yard to enquire if they have any specials on three/4″ plywood or any other woods y'all choose to use instead. This pattern is made using iii/4″ plywood every bit it used the least amount of material for the design. Nosotros take included the design files, then please feel free to alter information technology however you wish (especially if weight is an event). To route the pieces you volition need to download the Laser Air Filter .dxf file (saves as a zip file), right-click link and "salve as" if it does not open (you will demand AutoCad, Rhino or similar CAD software to open the file).
Outside Walls
I started off with routing the exterior walls every bit they are the largest and virtually of import role of the projection. If you accept the tools, the skills and the time, you really do non need to route annihilation else. It will save a lot of time and will exist more accurate which volition make assembly equally easy equally possible. If you exercise not want to route annihilation else, I would suggest at least routing the exterior of the air filtration system.
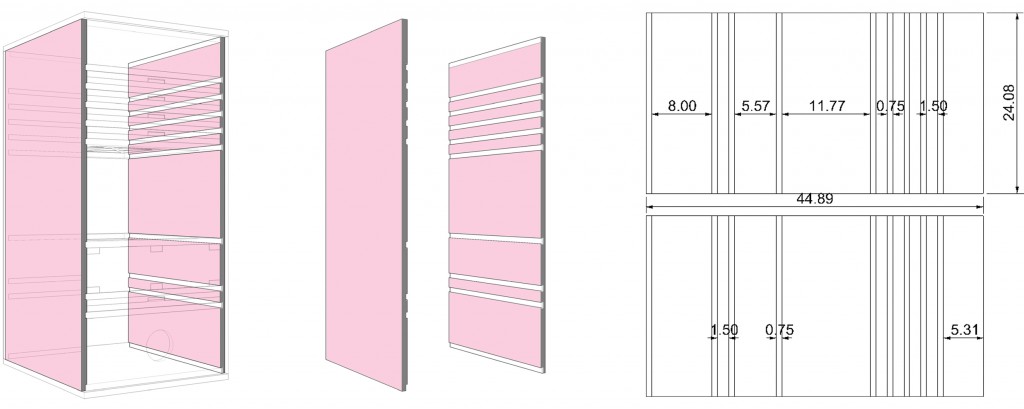
The paradigm above (click on image to zoom in) shows the two side panels for the exterior walls. The rectangles displayed are pocket cuts of 1/4″ deep, this is where the drawer frame volition be placed.
The next image, shown above (click on prototype to zoom in) is of the front and back panel. The pockets are over again i/4″ deep and there is a 4″ hole for the placement of the vent tubing.
Peak and Lesser
Next I routed the top and bottom of the air filter to be able to put the base in identify and add the interior components.
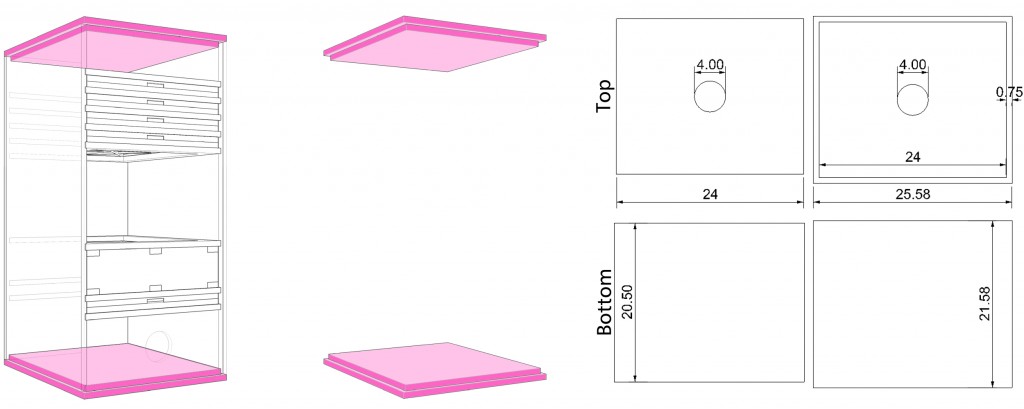
The Image higher up shows the top and bottom section of the light amplification by stimulated emission of radiation air filtration organization. I rastered out i/4″ of the top portion and then that it would fit snugly on the connecting sail. Other thicknesses tin be used for the top and bottom portions of this and will not affect the pattern. Only as to proceed information technology simple and relieve time all sheets hither are iii/4″ thick plywood.
The Shelves
The next pace is to road the shelves, which will exist placed forth the interior of the filter. This manner the drawers tin hands be slid in and out of the shelves without needing to disassembled.

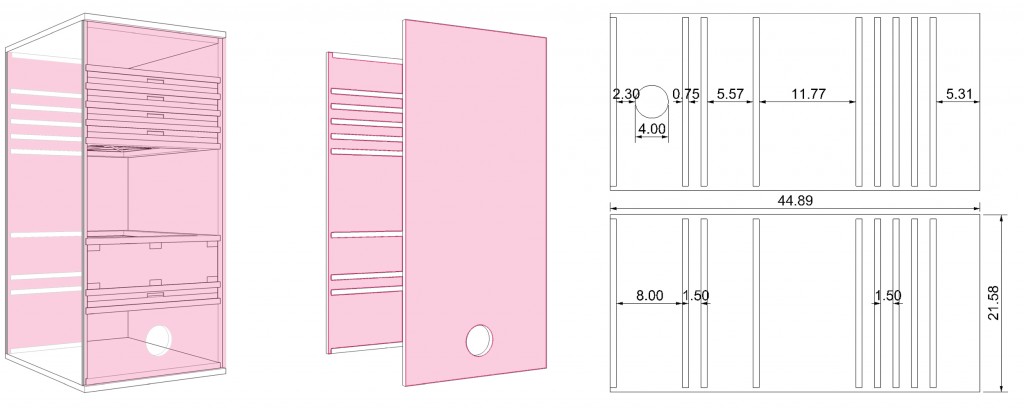
The Trays / Drawers (xvi″x20″x1″ and sixteen″x20″x5″)
One time the shelves have been put in identify, the next step is to make the drawers, which volition slide in and out of the shelves.
- Five 16″x20″x1″ air filter trays.
Showtime off we need 5 filter drawers to hold the filters (4 carbon filters and one fiberglass air filter to pre-filter the exhaust.
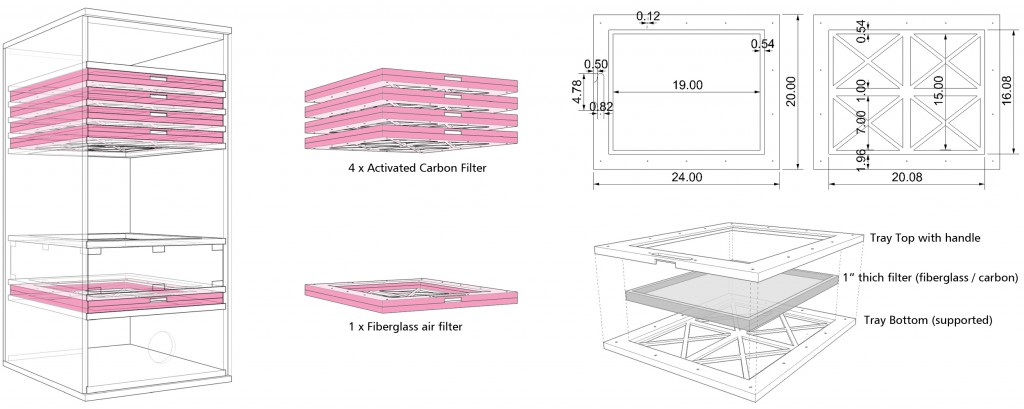
- One xvi″x20″x5″ air filter tray.
Secondly nosotros need 1 larger tray to hold the v inch filter.
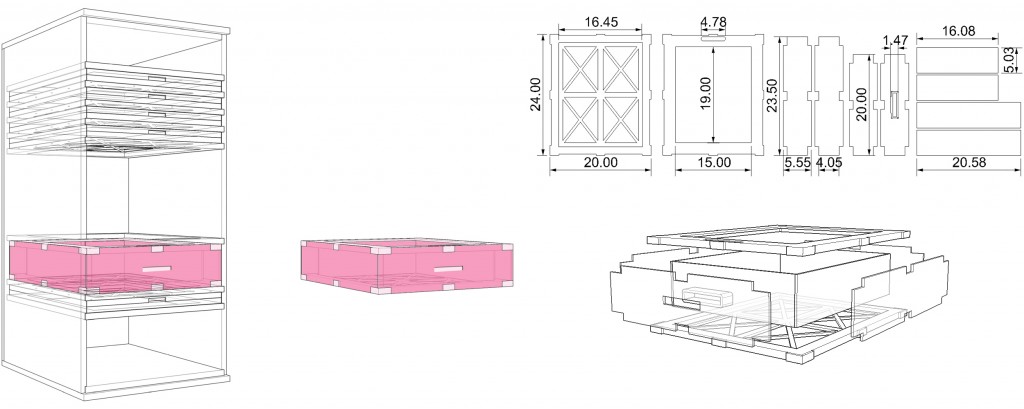
The epitome above shows the layout of the larger tray. What we volition practice is CNC road the peak and bottom and laser cut the side panels and 3d-print the interior handle (nosotros volition blueprint an alternative method if you do not take access to a 3d printer).

Above are the bottom and top ortions of the 5″ drawr for the larger air filter. They
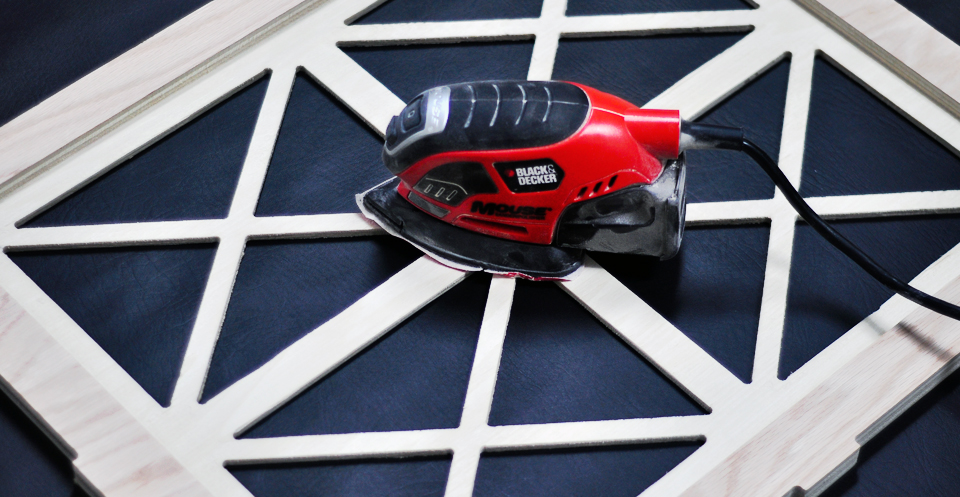
Next I sanded down the parts, depending on the bit used on the router you might demand to practise a lot of sanding. Its worth ownership a $22 Black & Decker Mouse sander (if yous don't already accept 1).
Assembly of the components
Next we will need to assemble the pieces. If everything was washed on a CNC router it should be relatively like shooting fish in a barrel. It was designed to be able to bolt the parts together and accept the power to detach it if necessary. Since I volition only need information technology at i location I am going to apply glue and seal everything off with silicone.
- Master Frame
The primary frame is made up of the top and bottom components as well as the outside walls. They have been designed to easily fit together so assembly should exist very directly forward.
- The Shelves
The shelves are another fixed function of the air filter where the drawers / trays will snugly fit between.
- The 1 Inch Trays (for the 16″x20″x1″ filters)
The 1 inch trays are the 5 smaller trays or drawers that sliding in and out of the filtration cabinet.
- The v Inch Tray (for the sixteen″x20″x5″ filter)
The five inch trays are used for the larger filters.

The epitome above shows the main components for the larger tray. The top and lesser (fabricated on the ShopBot CNC router) and the inner and outer panels cut out using a light amplification by stimulated emission of radiation cutter. These panels are fabricated of i/4″ birch plywood and are made quicker on the laser cutter. If you do not accept access to a laser cutter a cnc router volition work just likewise (only takes slightly longer to set up).
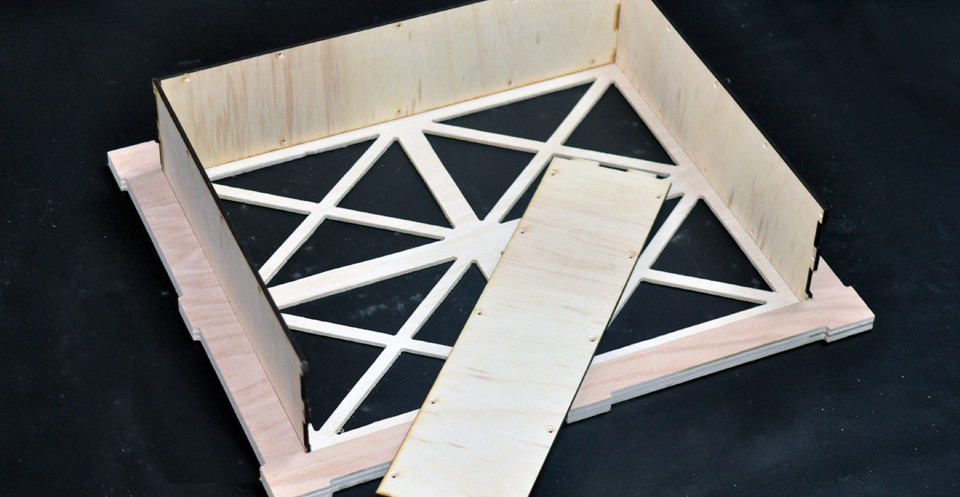
In a higher place the assembly of the inner panels are shown. They are glued and screwed into place. The sides press-fit together to make a secure fit.
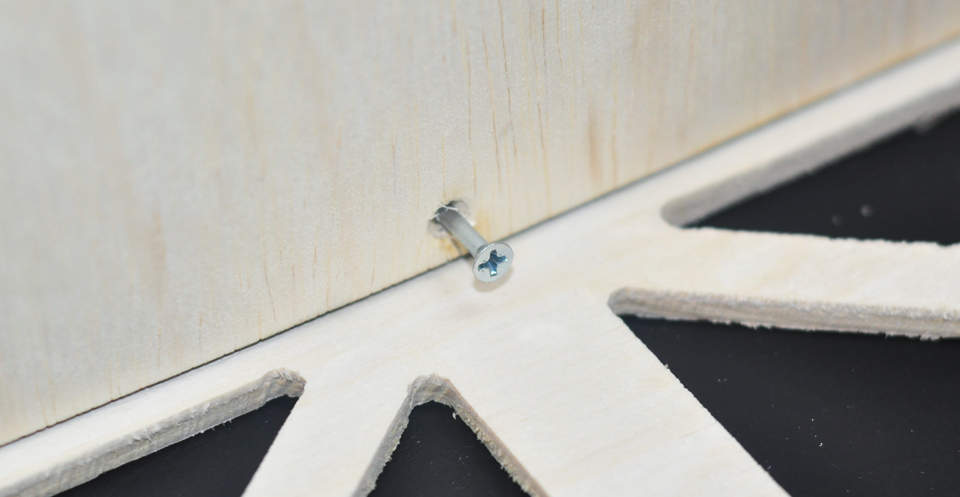
After the screws are put in identify I will use a caulk gun to close the small-scale gaps shown above, ensuring that no air will escape during engraving.
Air Filters
Earlier placing the drawers in the filter we will add together our replaceable air filters.
Attaching Tube Connectors
Every bit a final step we volition connect the tubes and adhere an frazzle fan to test the air flow.

How To Make A Filter For A Laser Cutter,
Source: https://lasercuttinglab.com/diy-laser-air-filter/
Posted by: keeleycopichatte59.blogspot.com
0 Response to "How To Make A Filter For A Laser Cutter"
Post a Comment